00.10.55 10 Photoshop Tips and Tricks for Beginners | |
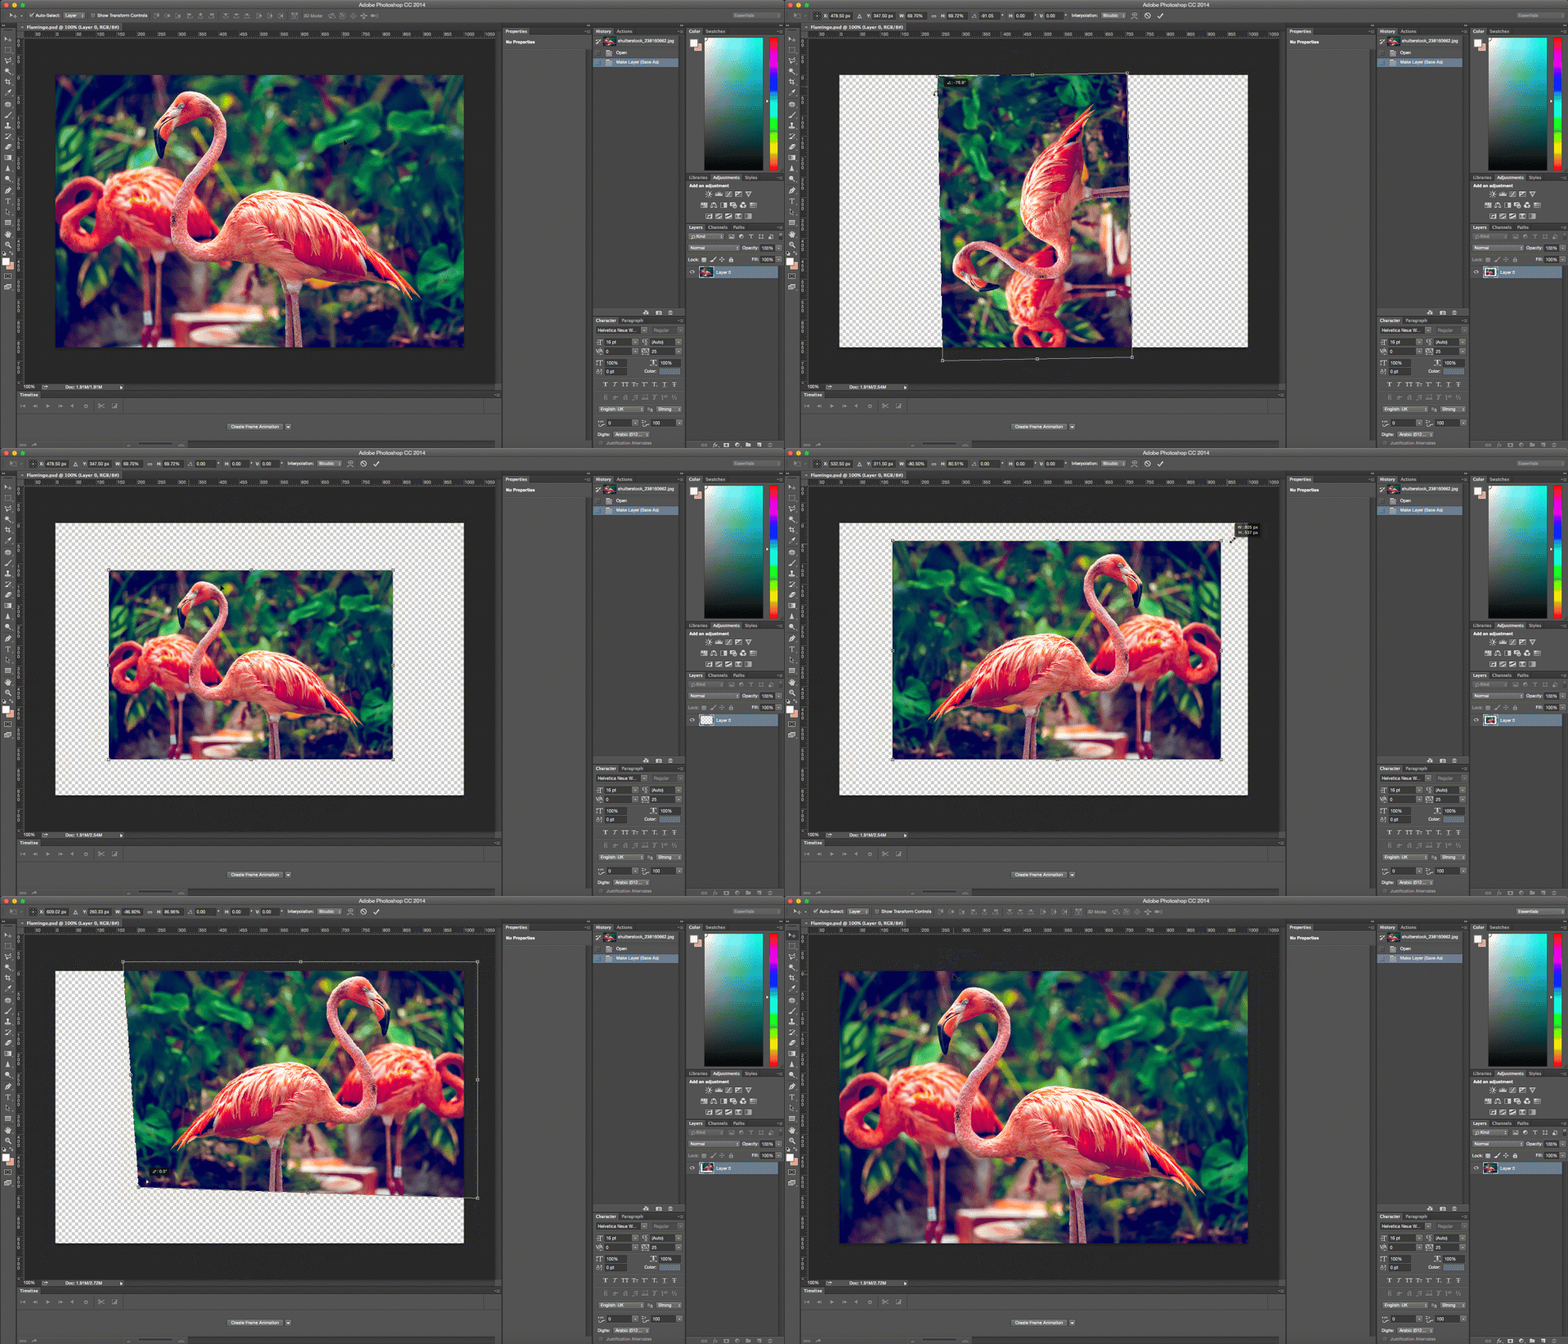
Did you know 2016 marks 26 years since the miracle of Photoshop came into our lives. Even if you’ve never used the program, you can’t deny the impact that this photo-editing software has made on our lives. Afterall, the term Photoshop has become so integrated into our digital lives that we’ve even turned it into a verb to describe all altered photos… even if the outcome can be a little ridiculous at times. Once regarded as a complicated secret weapon for graphic designers only, now nearly anyone with computer access can master this tool with nearly the same ease as creating a code-free website. From a blemish removal to adding some impressive design elements, anyone can learn the basics of Photoshop. Here are some of our favorite simple tips and tricks for Photoshop beginner. Note: All shortcuts in this article are phrased for PC users. Mac people – you know what to do. Transform: Change the size of an image, rotate, flip or distort it!Click Edit > then click Transform > and select the action you desire. Or try these shortcuts to make life even easier: Press Ctrl + T on your keyboard and a bounding box will then appear around the image, indicating transformation. This means you can now resize your image. The best way to do so is by placing the cursor on one of the rectangle corners of the box and then dragging the corner while holding the Shift key. When you’re finished just press Enter and you’re done. To flip your image vertically or horizontally press Ctrl + T and then right click your mouse. A popup window will appear with a few options for rotating and flipping the image. Select the action you want and when you are done press Enter. To distort or skew an image press Ctrl + T and then place the cursor on whichever corner you want to distort. Press Ctrl while holding your mouse down on whichever corner of the image you’re looking to morph and drag it down to your desired point, finally press Enter to activate.
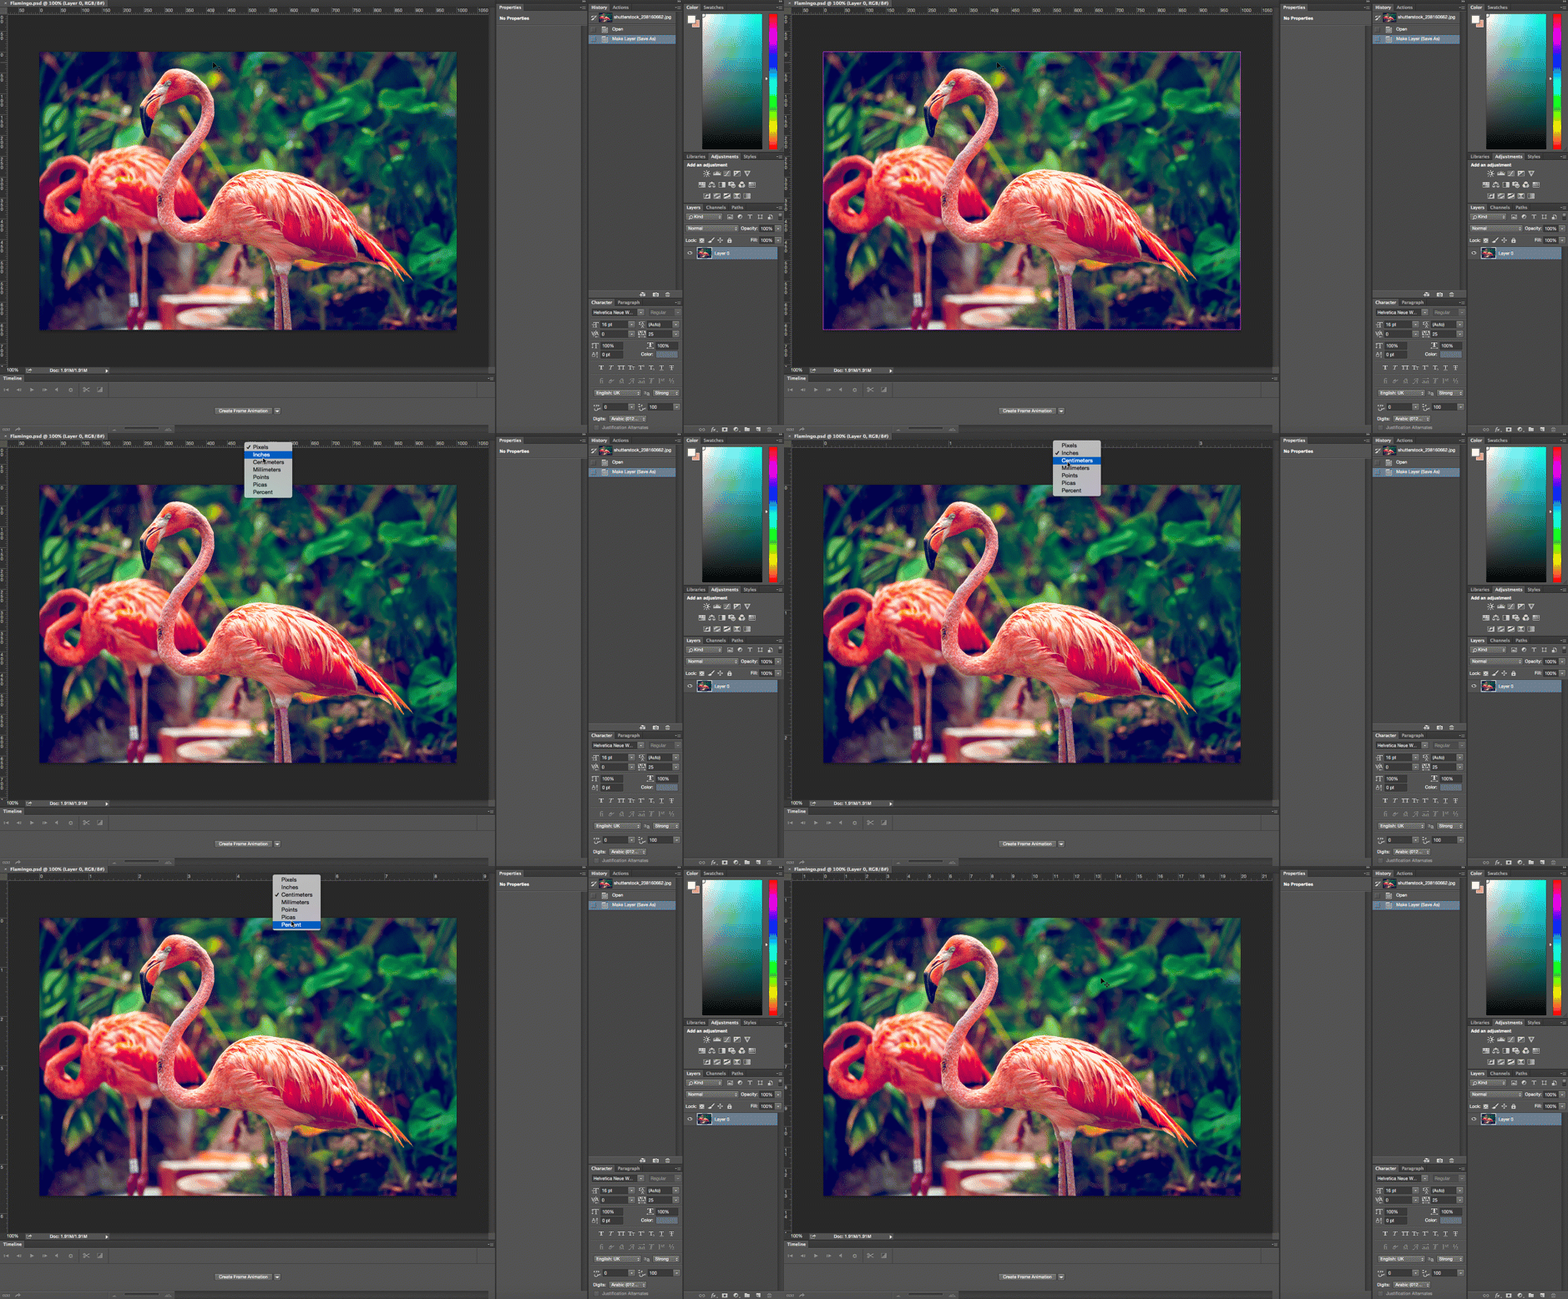
Change the Unit of MeasurementA short and quick way to switch between units of measurements that you’re working with is to place your cursor on one of the rulers on your grid (press Ctrl + R to show or hide the rulers), and right click, then choose a new unit from the context menu. There you’ll find a wide variety of units, from centimeters to pixels, millimeters, points and even percents.
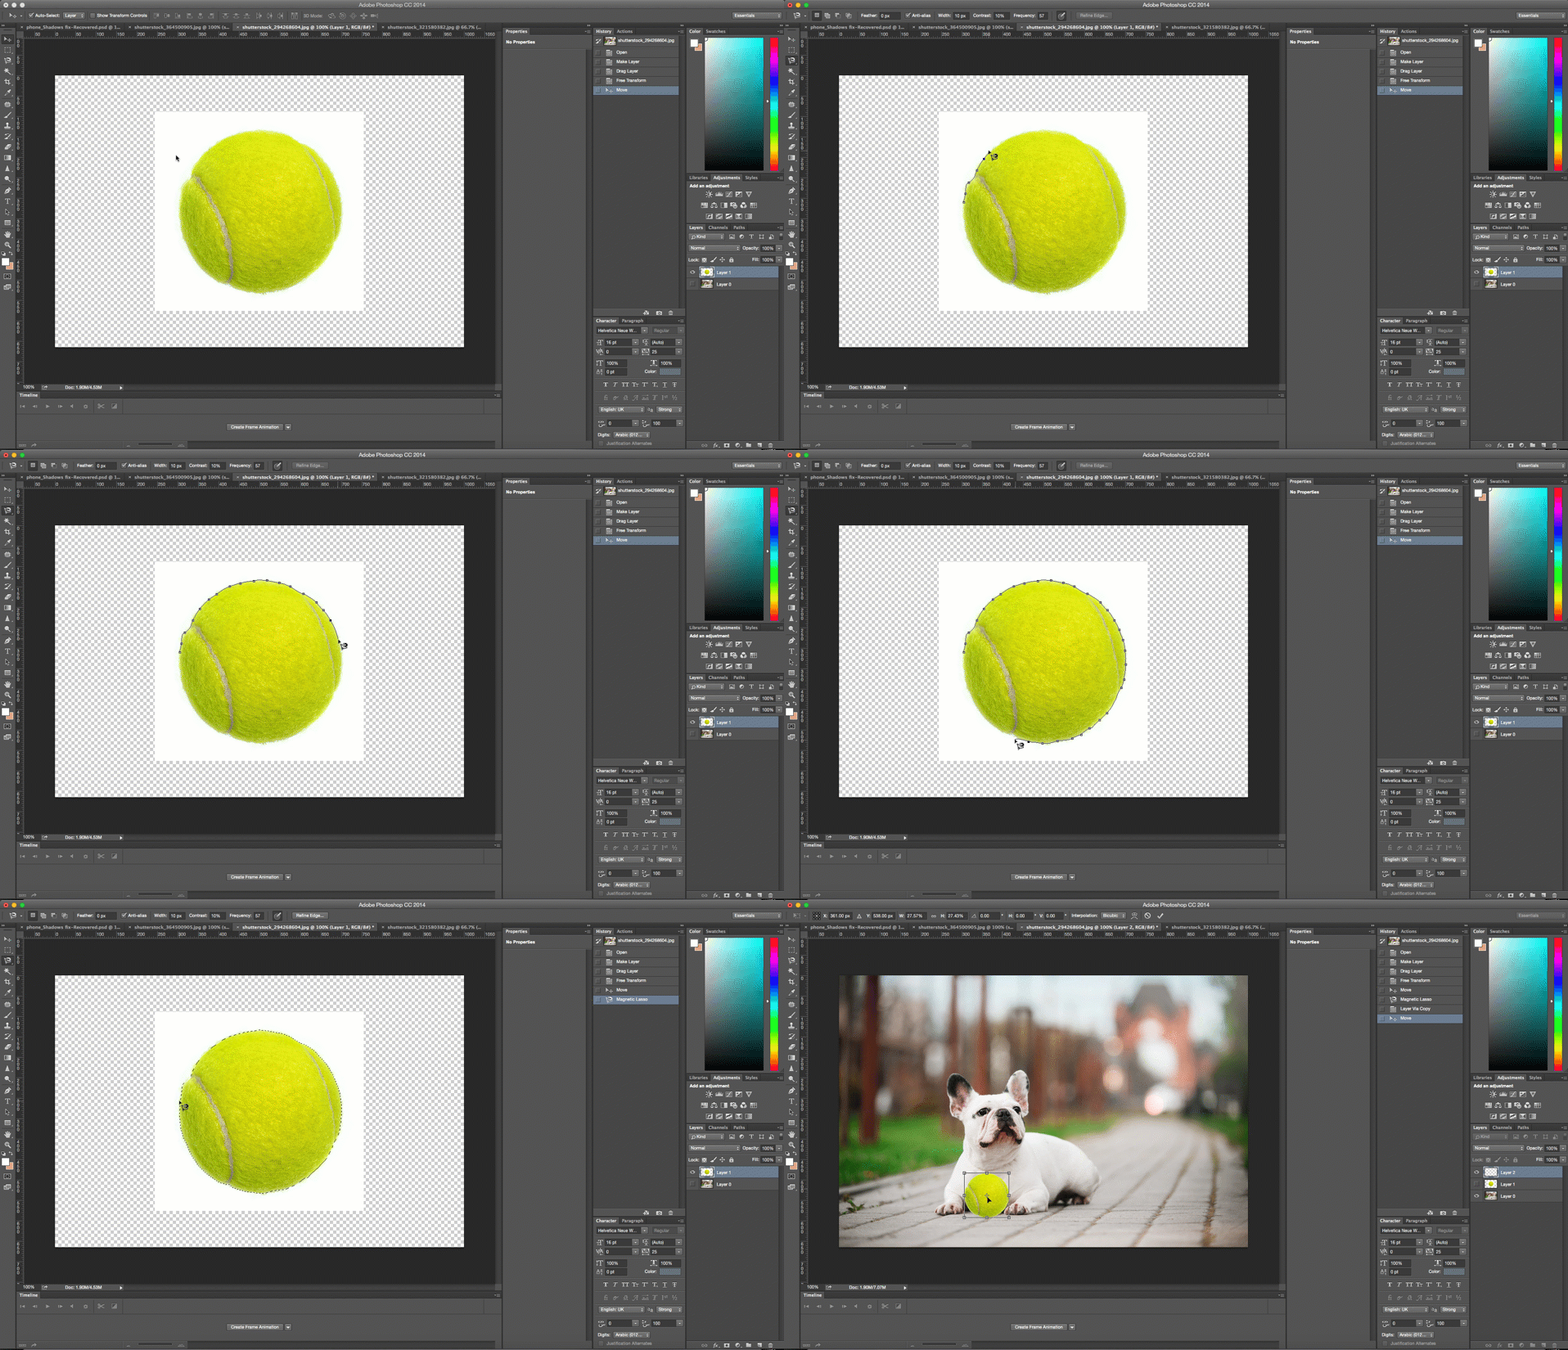
Magnetic Lasso ToolFound in plain sight in your Photoshop tool-panel, the Lasso tool is basically man’s gift to photo editing. This easy selection tool helps you trace and outline the exact part of an image that you’re looking to edit, and then separate it from the rest of your image in order to perform certain actions. For example, you can select and separate a product from its background. Nearly fool-proof, the magnetic lasso tool detects the edges of an object, so it works best when you have a bold contrast between an object and its background with well-defined edges. To access the Magnetic Lasso, click and hold your mouse button down on the Lasso tool until a fly-out menu appears . The Magnetic Lasso is the last one with a small magnet on its icon. Select it and then go to your image and place your mouse on the edge of the part you want to alter. Click your mouse once, release and just go over the edges of the object you want to select (just like you do with scissors when you cut something out).
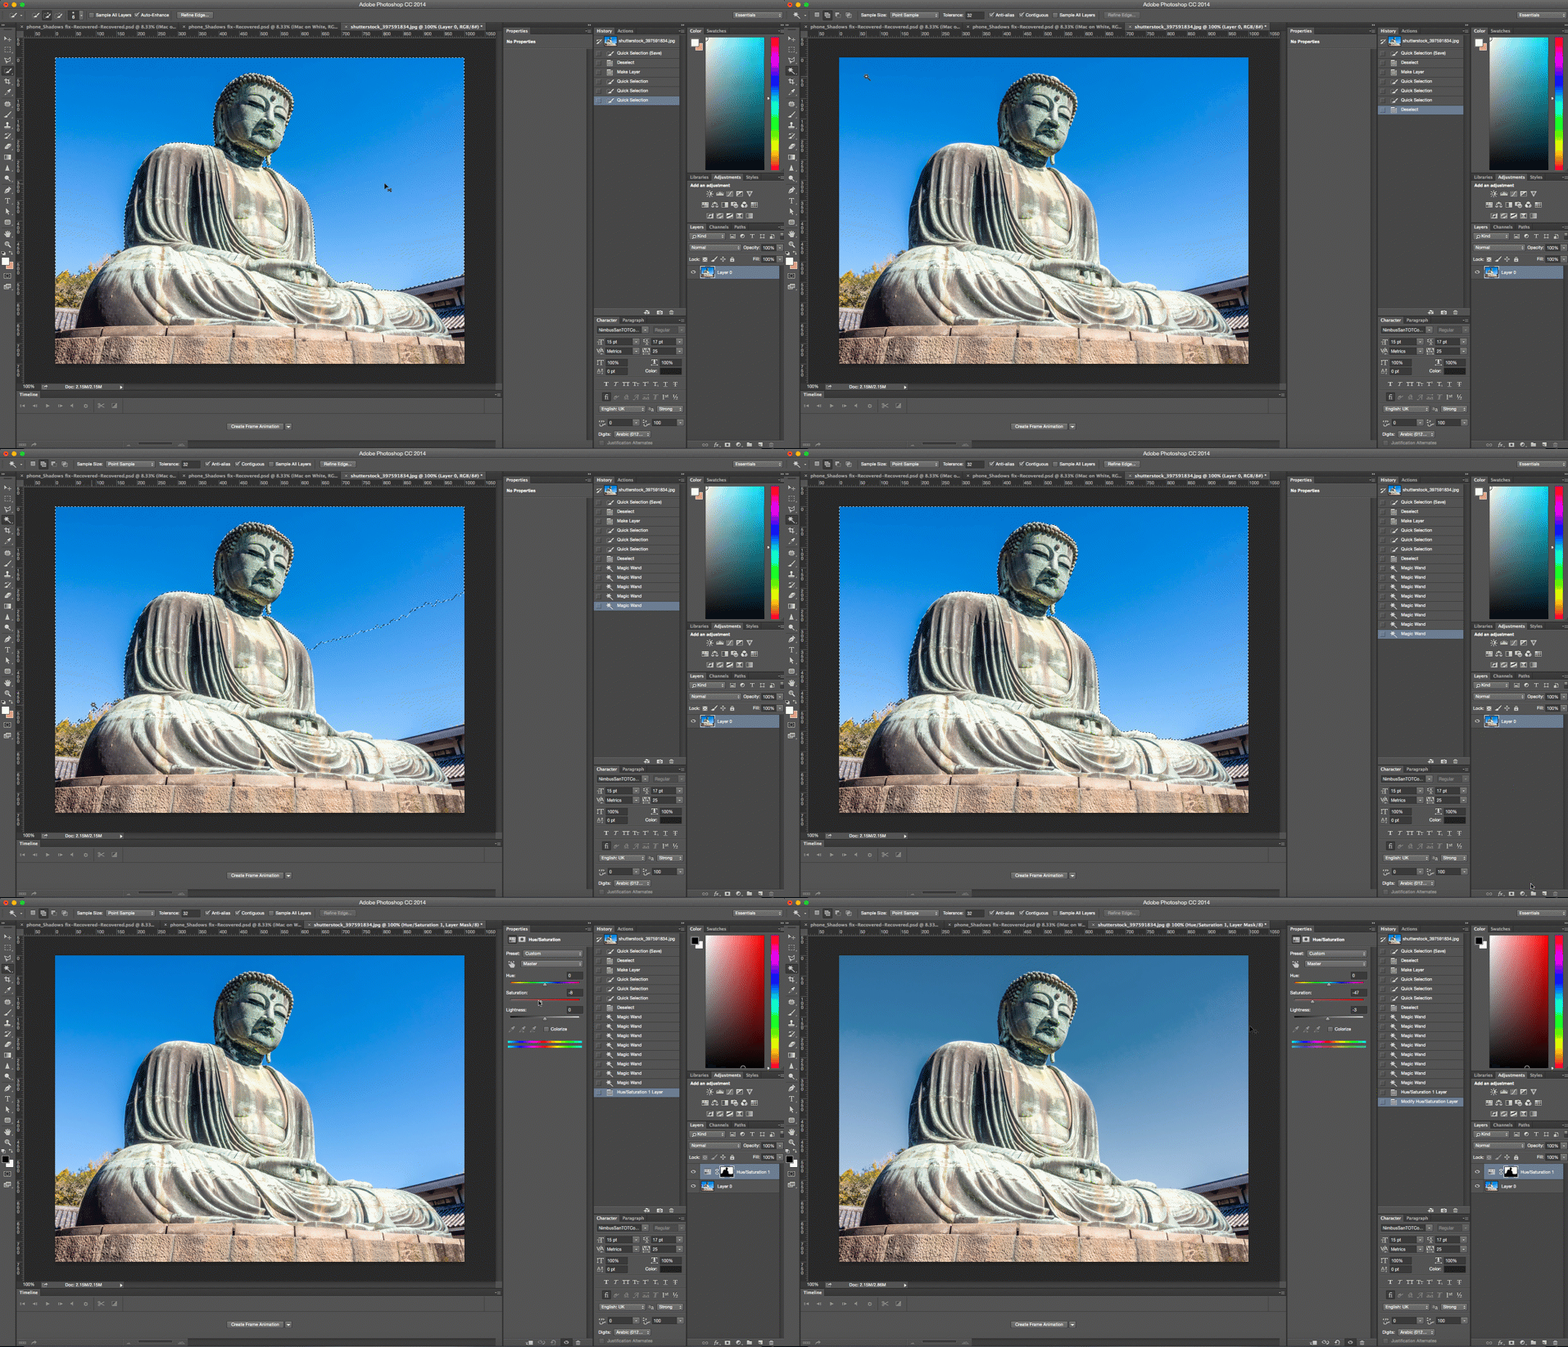
Magic Wand ToolThe Magic Wand is another selection tool, ideal for when you are working with a background that is more monotone and consistent (like a solid color or clear blue sky). The Magic Wand tool is most often used to switch up backgrounds or large color blocks. To use it, choose the Magic Wand tool from the tools panel and click on the part of the image you want to select. Make sure that you toggled the “add to selection” option on the top bar (icon of two squares) so that you can move forward with switching up the colors and tones of your selection.
Custom Shape ToolDid you know that in addition to photo editing, you can also easily add shapes and design elements to your Photoshop creations. The Tool Panel has all of the basic shapes you need like square, line, circle, ellipse etc in addition to a whole slew of extended options. The Custom Shape tool is easy to find in the Options Bar, represented by an icon that kind of looks like a puzzle piece. Access even more shapes by clicking again on the small arrow on the right side of the panel. If you are looking for banners, speech bubbles or arrows of all kinds, this is just the tool for you.
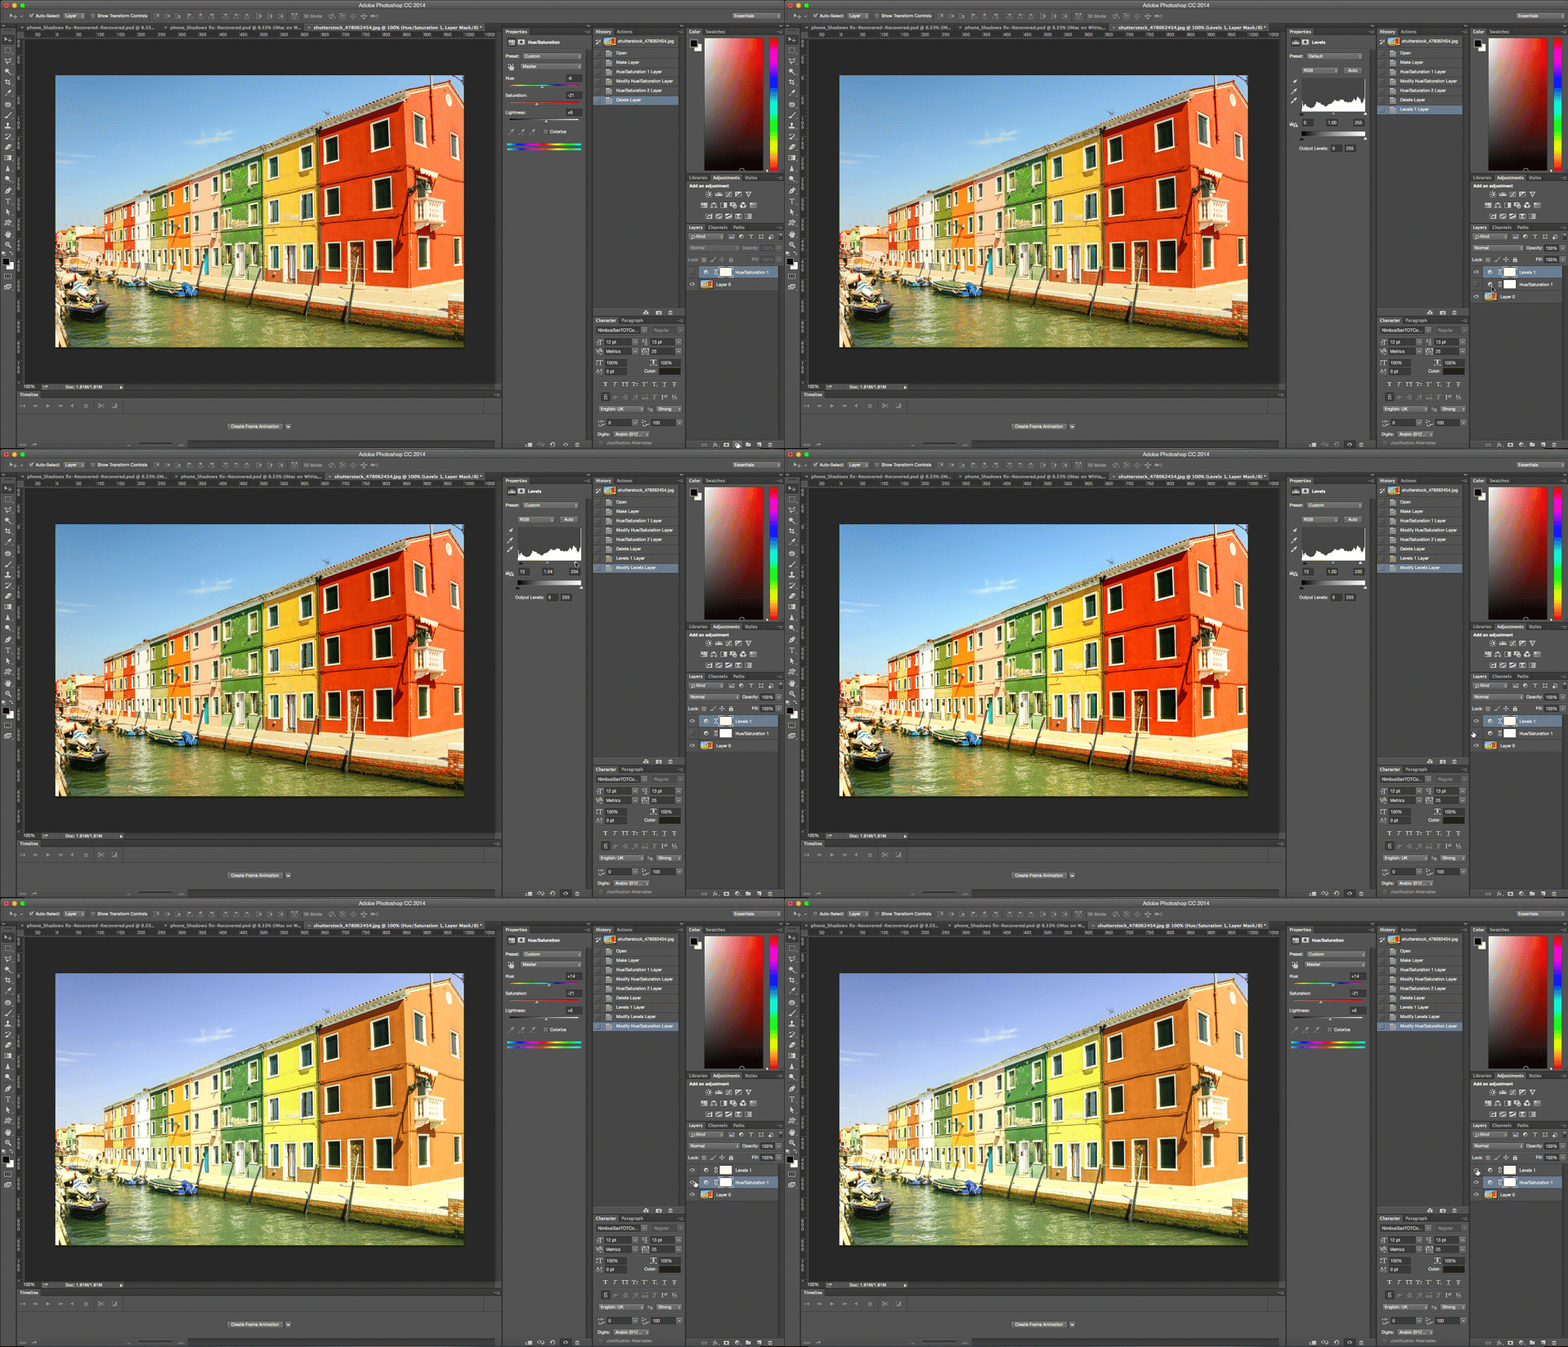
Adjustment LayersA truly stunning image generally has more to it than meets the eye. That’s what makes the Adjustment Layers tool so important. The Adjustment Layers tool lets you adjust the color and hue of your image by adding a top layer to it. The best part about this feature is by adding that extra layer, you can totally reverse your changes while keeping the rest of your image intact. You will find Adjustment Layers in the bottom of the the Layers Panel (a black and white circle icon).
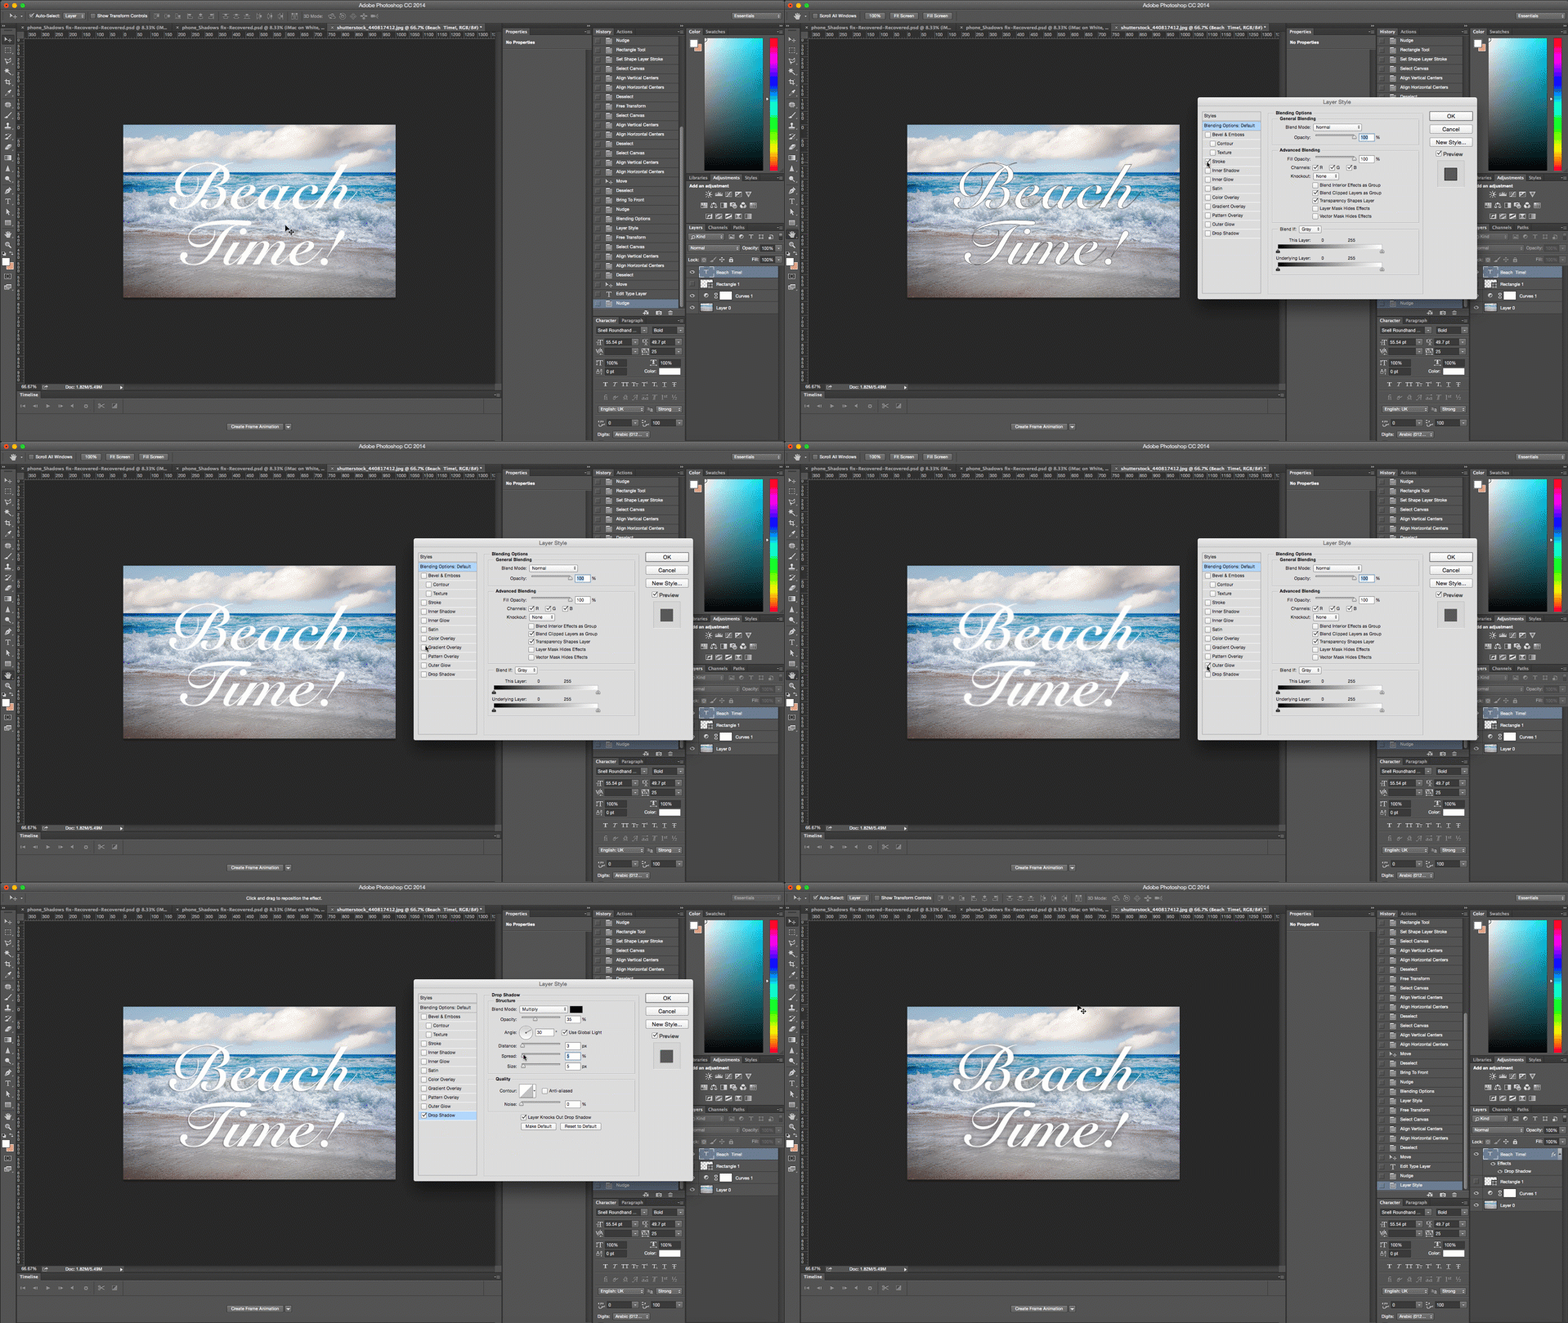
Layer StylesThis is a simple & easy way to add some pizazz to your image. Layer Styles are special effects that can be quickly applied to individual layers of your image. All you have to do is double click on a layer and then choose the effect you like. You can select from a whole variety of features, add a stroke or a glow, drop a shadow, and much more with just a click of the mouse. Be careful you don’t overdo it. These effects have a tendency to look cheap when used in excess.
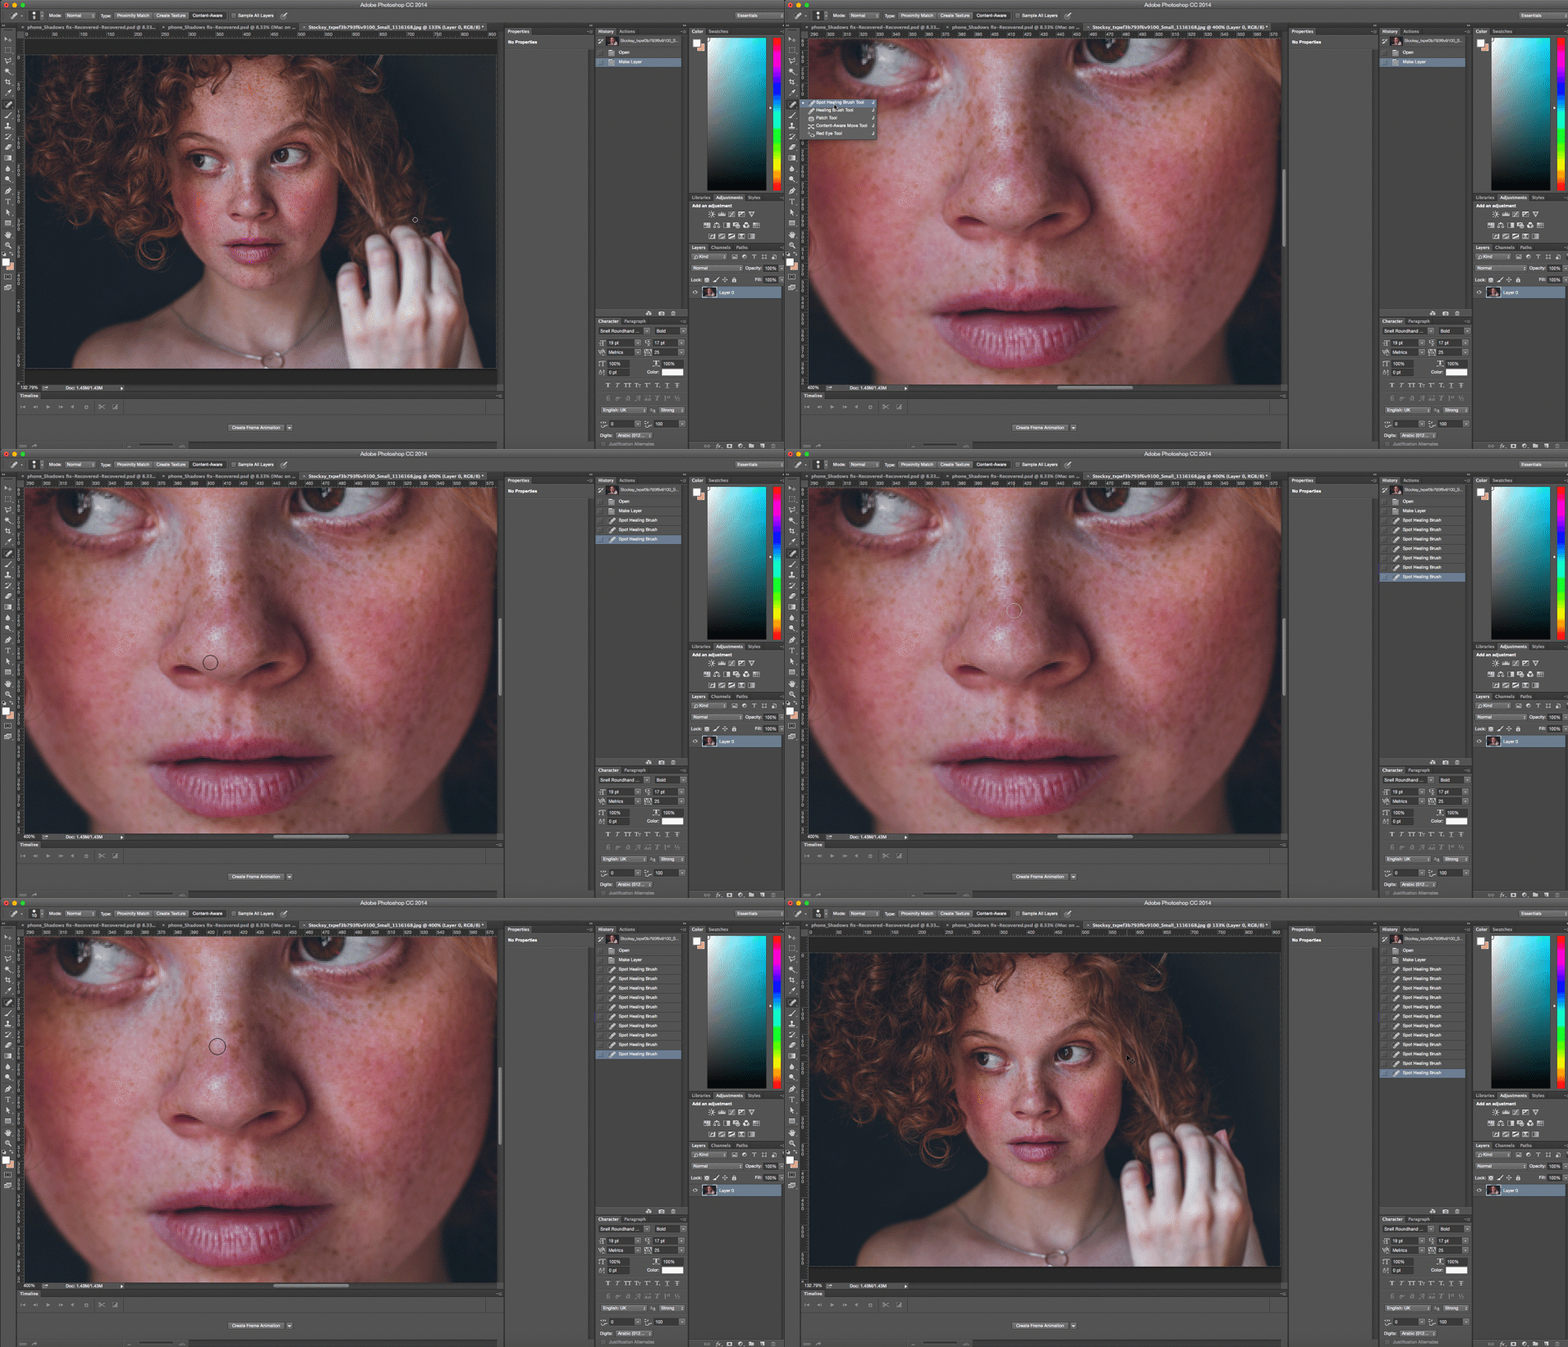
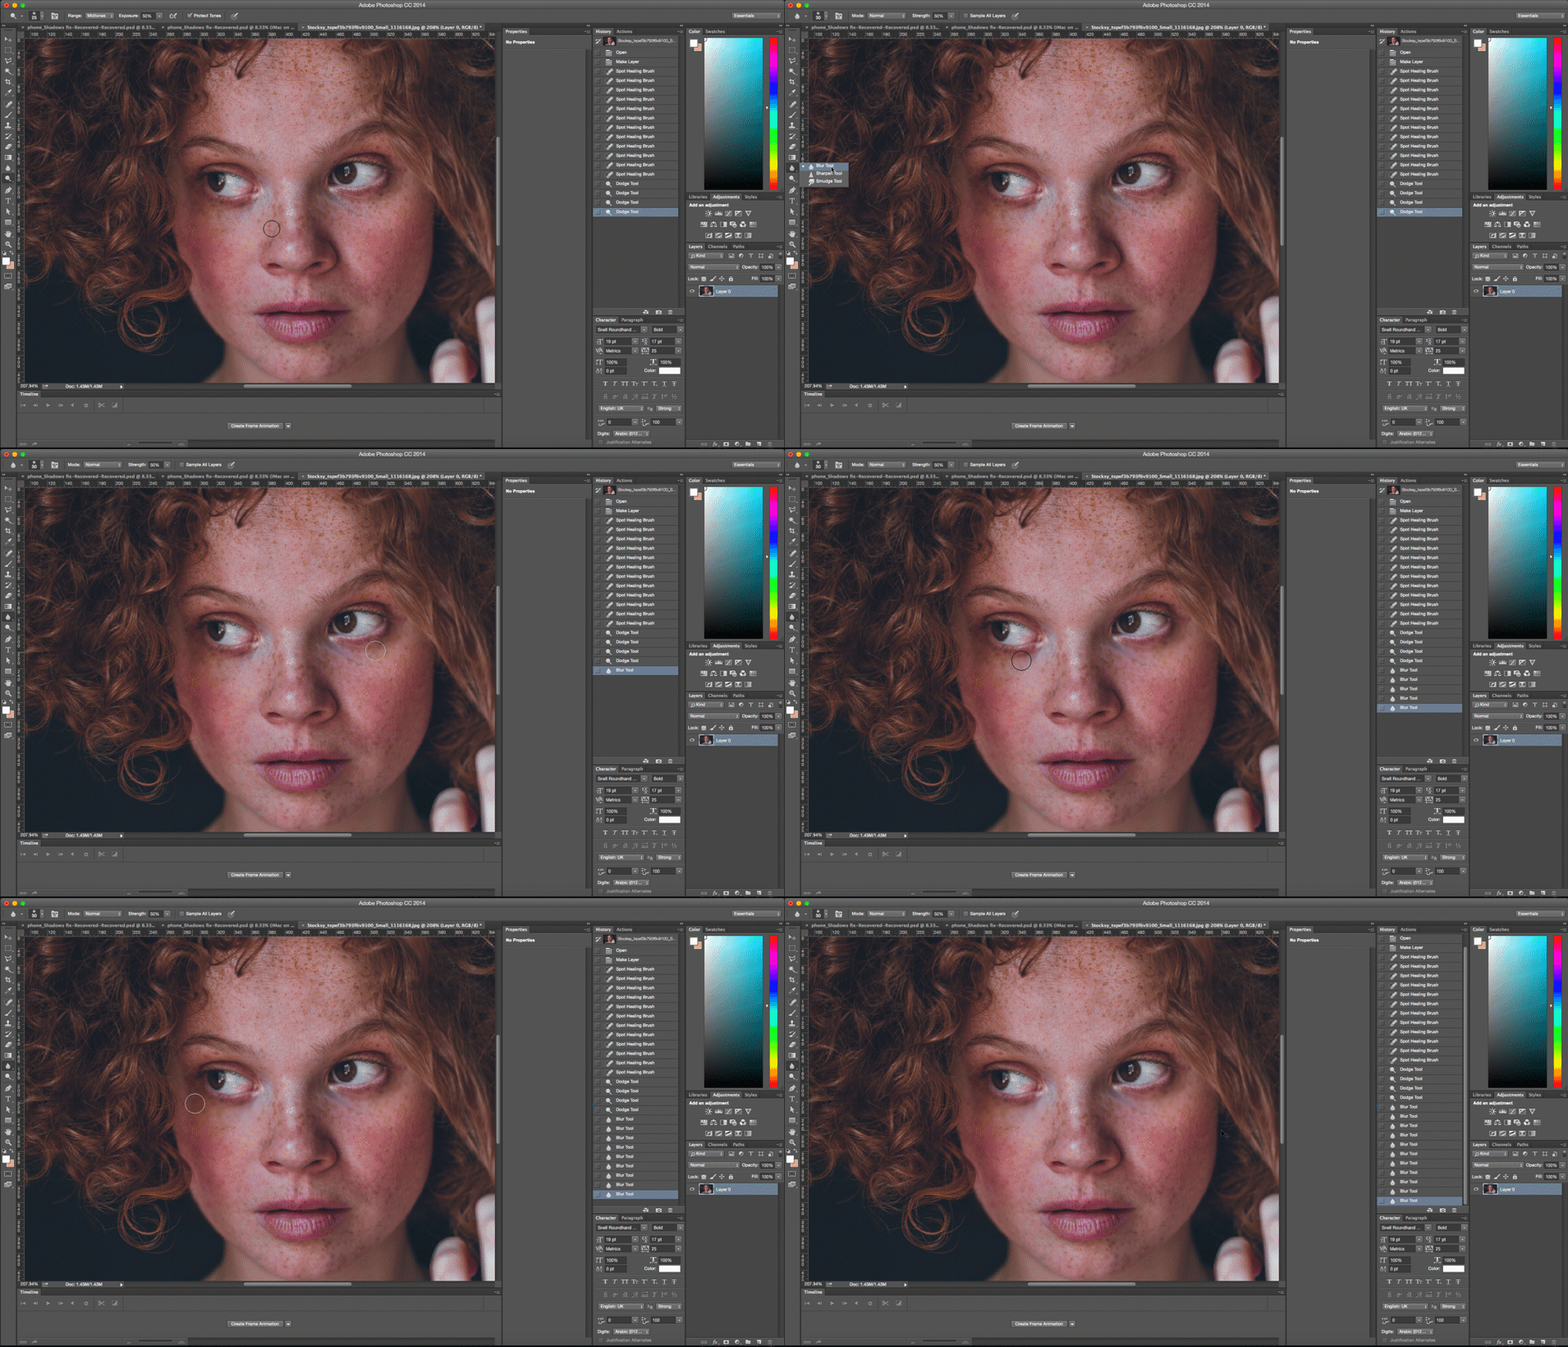
Spot Healing BrushProbably the tool that Photoshop is best known for, this tool was created to remove life’s little imperfections. The spot header brush is that magic tool that we wish was around in our awkward teenage years to make pimples disappear from every picture. Just place the brush over the area you want to “fix”, make sure the brush is a bit bigger than the blemish and click. Photoshop automatically samples from around the retouched area to color match your image to perfection.
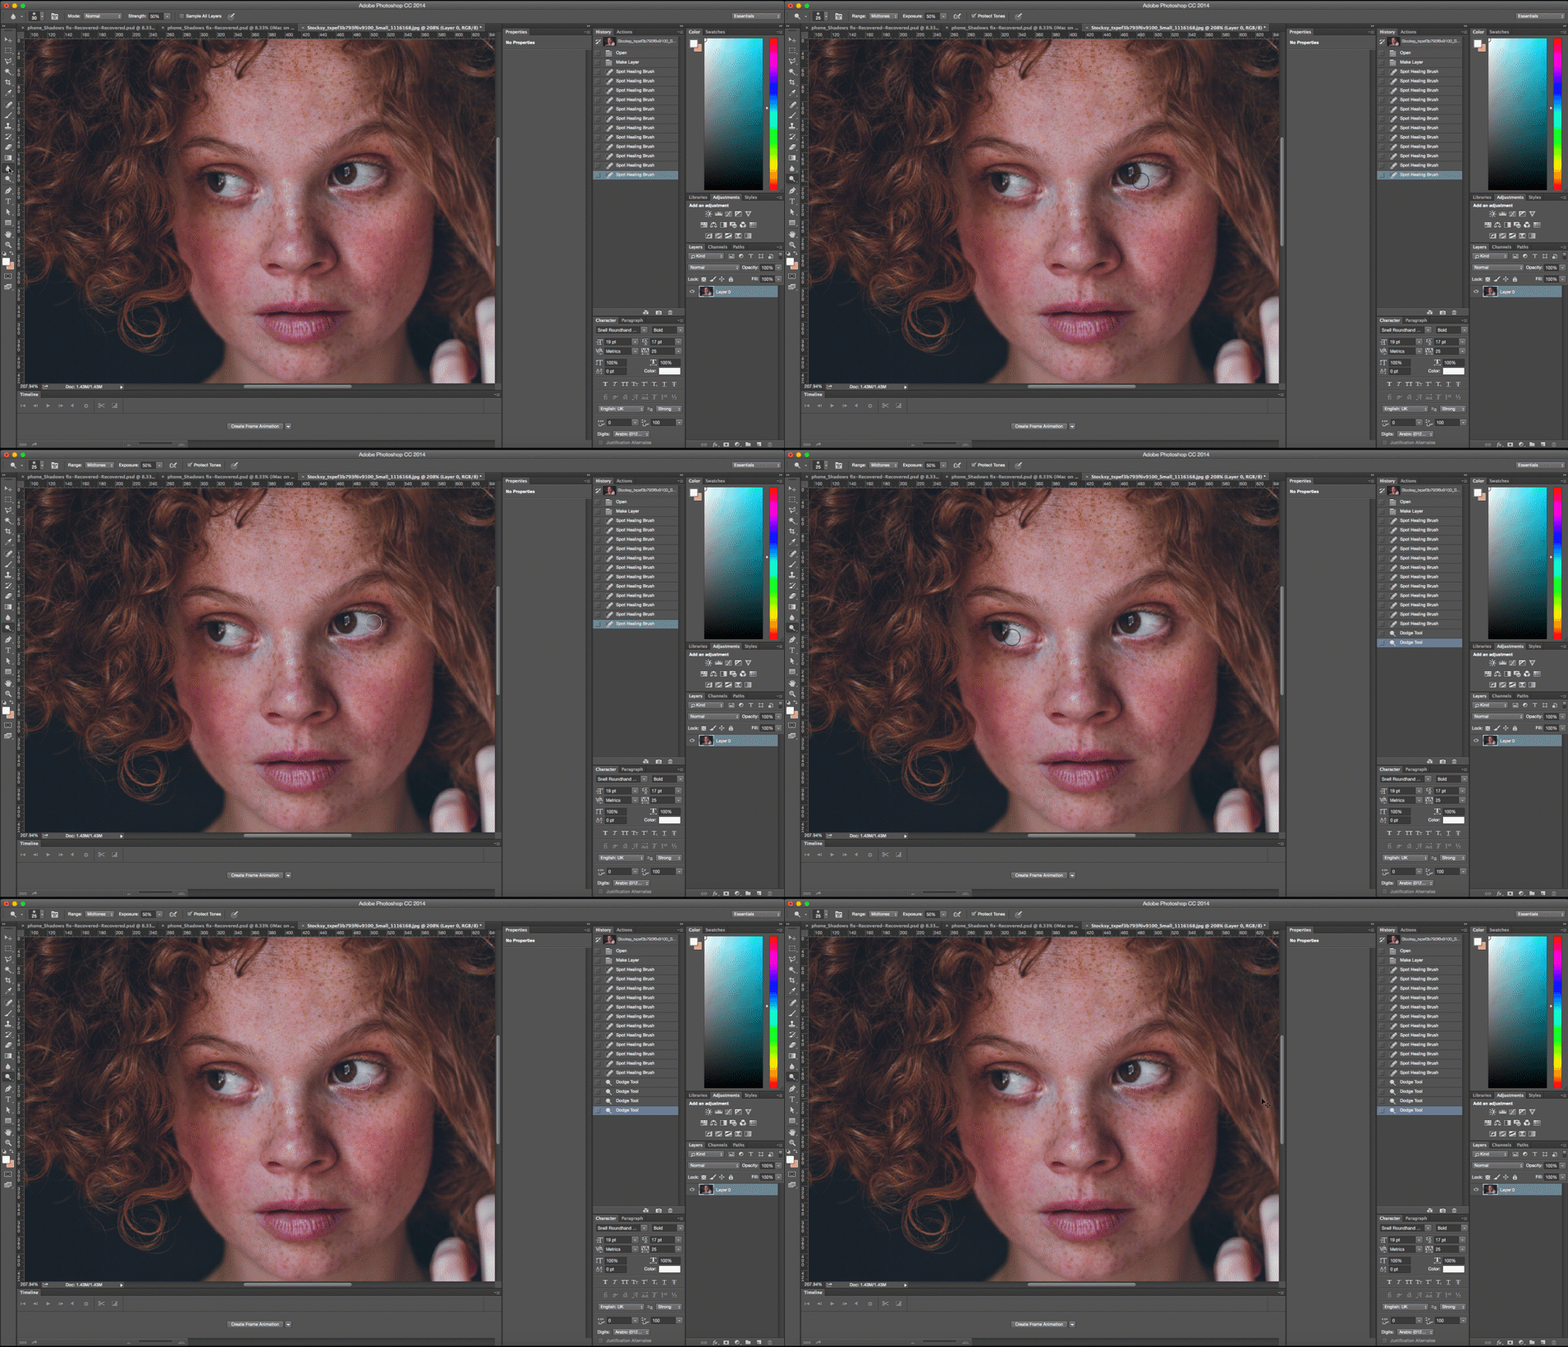
Dodge ToolThe Dodge Tool lightens pixels wherever you use it. So in other words, it’s the perfect Photoshop tool to do away with “tired eyes”. Set the Dodge Tool to a soft brush, go to Range setting in the menu bar’s pull-down and choose highlights, set Exposure on around 20%. Then carefully brush over the eye area. Remember not to overdo it, or your model will start to look like an alien. A few simple strokes should do the job.
Blur ToolSometimes all you need from Photoshop is to do away with some fine lines. That’s where the Blur tool comes in. This simple tool works wonders to remove small wrinkles by blurring them in just a bit. Use the Blur tool to smooth-out small imperfections like the wrinkles around the eye or mouth area and simply blur them into the background. Again, be gentle and remember not to overdo it or instead of improving your image or you can end up spoiling it.
Ready to look stunning online? Discover the power of the Wix website builder today! | |
|
| |
| Total comments: 0 | |
